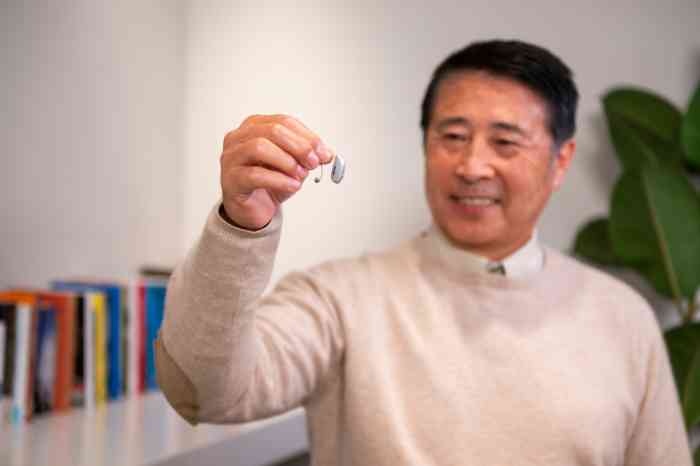
Changing the battery of a hearing aid is a straightforward task once you are familiar with the steps. Most hearing aids use small, round zinc-air batteries that are color-coded by size. Before you begin, make sure your hands are clean and dry to avoid damaging the device.
Learn more about how your hearing works from certified experts.
The 5-minute rule for hearing aid batteries refers to the practice of waiting about five minutes after removing the protective sticker from a zinc-air battery before inserting it into your hearing aid.
Zinc-air batteries are powered by oxygen. When you peel off the small tab, air enters tiny holes in the battery and starts a chemical reaction that generates power. If you place the battery straight into the hearing aid, it may not have absorbed enough oxygen to reach full voltage. This can shorten the battery life and sometimes cause the hearing aid to function less effectively. By waiting around five minutes, the battery has enough time to fully activate. This simple step can extend the battery’s lifespan by up to a couple of days, ensuring your hearing aid performs at its best.
We offer solutions that transform hearing, from nearly invisible, comfortable designs to robust AI technology.
Opening a hearing aid battery door is straightforward, but it needs to be done carefully to avoid damaging the device. Here’s how:
Most hearing aid users are supplied with a small magnetic wand or tool to help remove tiny batteries, but it is possible to do this safely without one. The key is to use your hands carefully and rely on simple techniques.
Start by washing and drying your hands. Open the battery door by gently lifting the small notch with your fingernail. Once the door is open, you will see the round zinc-air battery inside the compartment.
Without a tool, the easiest method is to tilt the hearing aid so the battery slides towards the edge of the door. In many cases, gravity alone will allow it to fall into your hand. If it sticks, use your fingernail to carefully nudge the battery from the side. Avoid pressing directly on the middle of the battery, as this can make it harder to remove.
Another trick is to hold the hearing aid upside down and gently tap it against your palm so the battery loosens.
After removal, place the used battery immediately into a secure container for recycling. This prevents accidental ingestion by children or pets. You can then insert a fresh battery and close the door firmly.
Rechargeable hearing aids are becoming increasingly popular, but whether their batteries can be replaced depends on the technology used. Most modern models use lithium-ion batteries, which are built directly into the device. These batteries are designed to last for around three to five years before their capacity starts to decline. Unlike disposable zinc-air batteries, lithium-ion units are not intended for home replacement. When performance drops, the hearing aids must be taken to a hearing care professional or sent back to the manufacturer for professional servicing. Attempting to open the device yourself can cause damage and may void the warranty.
Some older rechargeable hearing aids use silver-zinc batteries. These are removable and can usually be replaced by the user every 6–12 months, much like changing a standard hearing aid battery. However, this type of system is less common in new models. If your rechargeable hearing aids seem to run out of power faster than usual, it may indicate that the battery is aging. In this case, your hearing care professional can check the battery’s health and advise on replacement or servicing options.
One of the best ways to care for your ears and prevent hearing loss is to get them properly examined by a hearing care professional. Find your nearest Miracle-Ear store to get started on your journey to better hearing.
Rechargeable hearing aids are designed for convenience, but many people wonder what to do when the power source no longer performs as expected. In most modern devices, the rechargeable battery is built in and not meant to be replaced at home. These sealed batteries usually last for several years, but over time, their capacity decreases. When the hearing aid no longer holds a charge for a full day, takes longer to charge, or shuts down unexpectedly, it is usually a sign that the battery or device may need servicing. In this case, the best option is to take the hearing aid to a hearing care professional, who can test the battery, perform maintenance, or arrange a replacement if necessary.
Some older or less common models use removable rechargeable batteries. With these, you can change the battery yourself by opening the battery compartment, removing the old cell, inserting the new one with the correct orientation, and closing the door securely. These types of batteries typically need replacing every six to twelve months.
How often hearing aid batteries need to be changed depends on the type of battery used. Traditional disposable batteries, known as zinc-air batteries, come in four common sizes. The smallest size 10 usually lasts three to five days. Size 312 batteries typically last five to seven days, while size 13 batteries can last seven to ten days. The largest, size 675, may last up to 20 days. The exact lifespan depends on how many hours the hearing aid is worn each day and whether features such as wireless streaming are in use, as these drain power more quickly.
Rechargeable options have become increasingly popular in recent years. Most modern hearing aids now contain built-in lithium-ion batteries. These are sealed inside the device, recharged daily, and generally provide a full day of use on a single charge. Although they cannot be replaced at home, they typically last three to five years before requiring professional replacement. A less common option is the silver-zinc rechargeable battery, which is removable and designed for home replacement. These generally last between six months and a year before needing to be changed.
Never underestimate the importance of ear care, your hearing might depend on it.
New hearing aid batteries are usually zinc-air cells, which remain inactive until their protective tab is removed. Opening and preparing them correctly ensures they deliver the best performance. Start by washing and drying your hands thoroughly, as oils or moisture can interfere with the contacts. Each battery comes sealed with a small, colored sticker on its flat side. This tab keeps air out of the cell. To activate the battery, peel off the tab gently. Avoid using sharp tools, as this can damage the battery casing.
Once the tab is removed, the battery begins to activate as air enters through tiny holes. It is recommended to wait about one to five minutes before inserting it into your hearing aid. This short “breathing time” allows the battery to reach full voltage, giving you longer and more consistent power. Do not attempt to put the tab back on once it has been removed, as the chemical reaction cannot be paused.
Handle the battery carefully, ensuring you do not bend or scratch its surface. Keep spare batteries in their original packaging until needed, and always store them at room temperature. Properly opening and preparing your batteries will help your hearing aids perform reliably.


.jpg/jcr:content/renditions/cq5dam.web.700.700.jpeg)

 Find your closest Miracle-Ear center