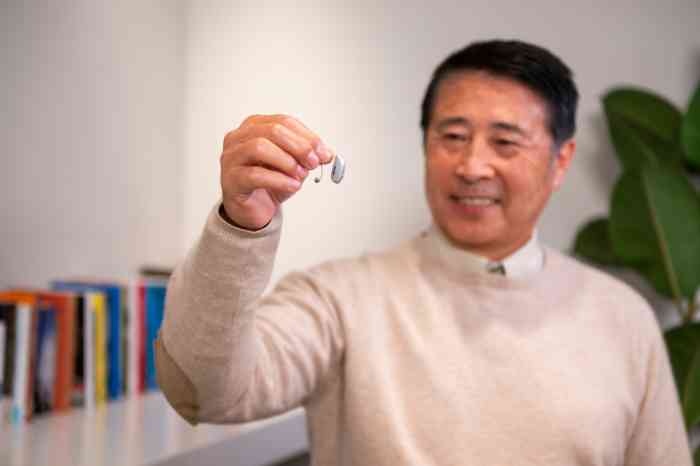
Cleaning behind-the-ear (BTE) hearing aids is essential to keep them working their best. Regular cleanings help maintain clear sound quality, prevent damage, and support long-term hearing aid performance. The good news is that most daily cleanings can be done at home using a few simple tools, such as a soft brush, wax pick, dry cloth, and bulb blower. Caregivers can assist with steps like earmold washing and drying when needed.
Join the millions of Americans who have trusted Miracle-Ear for hearing care that’s tailored to their needs.
Understanding which parts of your hearing aid to clean—and how to clean them properly—helps protect its electronic components and ensures the sound remains clear and uninterrupted. With consistent cleaning habits and occasional professional checkups, your BTE hearing aids can remain dependable, comfortable, and effective every day.
A basic cleaning kit makes daily and weekly maintenance easier. Below are the tools you’ll typically need and how they help:
A small brush helps remove dust, skin oils, and loose earwax from the outside of the hearing aid and microphone openings.
The purpose of this tool is to remove earwax from the small openings in the earmold. It helps clear blockages that can reduce sound.
Having these items on hand makes routine cleaning simple and helps keep your BTE hearing aids sounding their best.
Regularly cleaning your BTE hearing aid helps it perform at its best and extends its lifespan. Follow the steps below to learn how to safely clean your hearing aid and earmold.
Carefully remove the earmold from the hearing aid ear hook before cleaning it. This makes it easier to clean thoroughly and helps protect the hearing aid electronics from moisture.
If the earmold looks cloudy, discolored, or has more buildup than brushing can remove, you can wash it:
Important: Never use harsh chemicals or alcohol to clean the earmold unless the product is labeled to use on earmolds. These can damage the material.
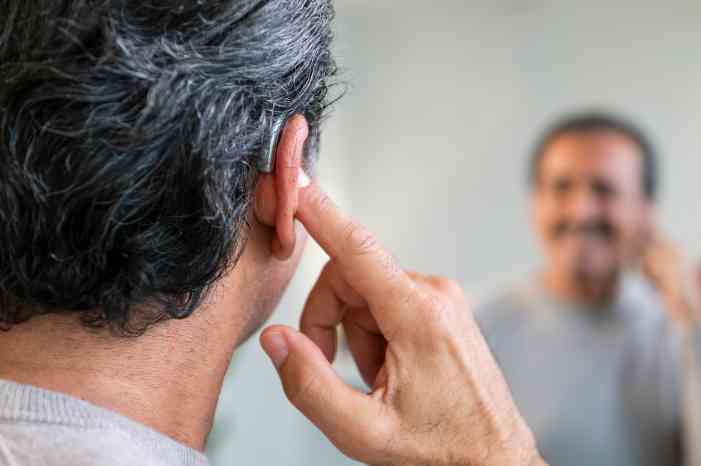
Behind-the-ear (BTE) hearing aids should be cleaned every day or at least several times a week to prevent earwax, skin oil, and debris from affecting sound quality. Daily cleaning helps keep the microphone openings, earmold, and tubing free from buildup that can muffle sound or block airflow. A quick routine usually includes brushing the hearing aid surface, checking the earmold for wax, and wiping everything with a soft, dry cloth.
For users who produce more earwax, additional cleaning may be needed. Washing the earmold with warm, soapy water can be done weekly or whenever buildup becomes noticeable. Make sure the earmold is completely dry before reattaching it to the hearing aid to prevent moisture damage. Consistent cleaning can reduce the need for repairs, maintain clear sound, and help your hearing aids last longer.
The microphone openings on BTE hearing aids are extremely sensitive and require very gentle cleaning. Never insert sharp objects or cleaning tools into the microphone ports, as this can cause permanent damage.
To clean the microphone safely, hold the hearing aid upside down so the microphone openings face downward. This allows loose debris to fall out rather than being pushed deeper inside.
Use a soft cleaning brush to lightly sweep across the openings. Brush using short, gentle strokes with very little pressure. Do not blow into the microphone openings with your mouth, as moisture from breath can harm the device. If sound still seems weak or blocked after cleaning, the microphone may require professional attention or filter replacement by your hearing care professional. Regular and gentle brushing prevents buildup and keeps sound crisp without risking damage.
Yes, the earmold on most BTE hearing aids can be washed with warm water and mild soap, but the hearing aid device itself should never get wet. To clean the earmold, disconnect it from the hearing aid ear hook. Rinse it under warm water and add a small amount of gentle soap. Clean it thoroughly to remove earwax, skin oils, and bacteria.
After washing, rinse well to ensure no soap residue is left behind. Allow the earmold to air dry completely before reattaching it. If water remains in the tubing, use a bulb blower to remove moisture. Do not use alcohol, bleach, or household cleaning sprays on the earmold, as these can damage the material. If your earmold contains electronic components (such as receivers), do not wash it; check your model’s instructions or ask your hearing care professional.
After washing the earmold, allow it to air dry completely before reconnecting it to the hearing aid. Lay the earmold on a clean towel in a warm, dry place, but avoid using heat sources like hair dryers or direct sunlight, which can cause the material to warp. To remove moisture trapped inside the tubing, use a bulb blower by attaching it to the tubing opening and gently squeezing air through to push out water droplets. This step helps prevent moisture buildup that can block sound or grow bacteria.
Some users also benefit from using a hearing aid drying case or dehumidifier, especially in humid climates. Once the earmold and tubing feel completely dry and clear, you can safely reattach them to the hearing aid hook. Ensuring full dryness helps maintain clear sound quality and protects your device from moisture-related malfunctions.
Learn more about how your hearing works from certified experts.
A bulb blower is a small, rubber tool that pushes air through the earmold tubing to remove moisture and loosen earwax. It is especially useful after washing the earmold, as any remaining water in the tubing can block sound or cause muffling. To use a bulb blower, first detach the earmold from the hearing aid so the electronic portion remains separate and dry.
Hold the earmold with the tubing opening facing you, insert the blower tip into the end of the tubing, and squeeze the bulb several times to push air through. You should see moisture or tiny droplets exit from the other end. Continue blowing until the tubing appears dry. Allow the earmold to completely airdry before reattaching it to your BTE hearing aid. Using a bulb blower regularly can improve sound clarity and prevent moisture-related issues.
It is not recommended to use alcohol wipes or disinfectant sprays directly on your BTE hearing aids, especially near the microphone openings or sound ports. Alcohol can dry out or damage delicate components, and liquid sprays can easily seep inside the device. However, alcohol-free hearing aid cleaning wipes, designed specifically for hearing aids and earmolds, are safe for surface cleaning. For the earmold only (not the hearing aid body), mild soap and warm water are typically the safest cleaning method.
If disinfection is needed due to concerns about germs or skin irritation, use products specifically labeled for hearing aid use. Avoid household disinfectants, bleach, hand sanitizers, and baby wipes, as these can degrade materials and harm performance. When in doubt, consult your hearing care professional for safe cleaning product recommendations. Keeping your device dry and clean without harsh chemicals ensures longer device life and better sound.
If your BTE hearing aid still sounds muffled after cleaning, check a few additional areas. First, ensure the earmold tubing is completely dry and free of moisture. Even a small droplet can block sound. Use a bulb blower to remove trapped water if needed. Next, inspect the tubing for signs of stiffness, cracks, or discoloration—old tubing can become blocked or brittle and may need to be replaced.
Also, check that the earmold is inserted correctly in your ear; an improper fit can cause weak or unclear sound. If the microphone appears clean but sound remains muffled, the issue may be internal, such as a clogged microphone filter or programming issue. At this point, contact your hearing care professional for evaluation. They can replace filters, test the device, or adjust settings. Consistent muffling should not be ignored, as early intervention prevents further damage.
To remove the earmold safely, hold the hearing aid body in one hand and the plastic earmold hook or tubing in the other. Gently twist the tubing while pulling it away from the hearing aid hook—avoid pulling sharply or bending the hook forcefully, as this may damage the tubing or loosen the connection. Most BTE earmolds are designed to detach smoothly, but if they feel stuck, avoid using excessive force.
Instead, check for hardened or brittle tubing, which can make removal harder and may indicate that the tubing needs to be replaced. If your BTE model uses thin tubes or receiver-in-ear wiring, the removal method may differ, and you should follow specific instructions for your device. Once removed, clean the earmold separately from the hearing aid to protect the electronic components from moisture. Reattach the earmold only after it is completely dry.
No, never use soap or water directly on the hearing aid device itself. The electronic components inside a BTE hearing aid are sensitive to moisture and may stop working if exposed to liquids. Soap can leave behind residue that may block microphone openings or affect sound quality. Soap and warm water should be used only on the earmold once it has been detached from the hearing aid hook.
To clean the hearing aid body, stick to dry cleaning methods: brushing away debris with a soft brush, wiping the exterior with a dry lint-free cloth, and gently clearing wax near the sound ports with a wax pick if needed. If the hearing aid casing becomes oily or sticky, use hearing aid–safe cleaning wipes that are alcohol-free and formulated specifically for hearing devices. Keeping the hearing aid dry ensures long-term performance and prevents damage from moisture exposure.
Yes, using a drying case or hearing aid dehumidifier is highly recommended for most BTE users. Moisture can come from sweat, humidity, rain, or even temperature changes as you go from indoors to outdoors. A drying case removes this moisture overnight, helping prevent internal corrosion and prolonging the life of microphones and sound ports.
There are two main types: passive drying cases, which use a drying tablet to absorb moisture, and active electronic dehumidifiers, which use gentle heat or air circulation for deeper drying. Either option helps maintain clear sound and reduces muffling caused by moisture. Drying cases are especially beneficial for people who live in humid areas, exercise frequently, or naturally produce more perspiration. Using one every night is a simple routine that protects your investment and keeps your hearing aids working consistently throughout the day.
Yes, there are slight differences. Standard BTE hearing aids with traditional earmolds usually allow the earmold to be fully removed and washed with warm, soapy water. Traditional tubing is thicker and easier to clean with a bulb blower. BTEs with thin tubes, however, typically have lightweight, narrow tubing that cannot be washed or soaked. Thin tubes must be cleaned only with an air blower or a specialized cleaning filament designed to clear wax without damaging the tubing.
Earmolds attached to thin tubes may also differ—some are soft domes that should not be washed, while others are washable molds. Always check your device instructions. Thin tubes also tend to require more frequent replacement, often every 2–3 months, because buildup affects them more quickly. Understanding which type you have ensures you clean your device safely and effectively.
If you have limited hand dexterity, cleaning BTE hearing aids can still be manageable with the right tools and technique. Choose larger-handled cleaning brushes and wax loops designed for an easier grip. Using a hearing aid cleaning mat or towel on the table can help keep the device from slipping while you work. Consider cleaning the device while it is resting flat rather than holding it in your hand.
If handling the tiny tubing is difficult, ask your hearing care professional about tubing with easier snap-on connectors or switching to thin-tube or dome styles if appropriate. Caregivers can also assist with weekly deep cleaning and earmold washing. Daily tasks, such as gentle brushing and wiping, can be done with slow, steady motions and good lighting. At Miracle-Ear, your care is on us. From your first hearing test to free unlimited servicing, cleanings, and check-ups.
No, you will not damage your BTE hearing aid by cleaning it regularly—as long as you clean it properly. In fact, daily cleaning helps prevent damage by stopping wax and moisture from entering sensitive parts of the device. Problems only occur if the cleaning process involves excessive pressure, sharp objects, moisture reaching electronic components, or harsh chemicals.
Avoid poking tools into the microphone openings, and never use water, alcohol, or household cleaners on the hearing aid body. For earmolds, washing is safe only when they are detached. Consistent, gentle cleaning extends the life of the device and reduces the need for repairs. If you’re unsure, ask your hearing care professional to show you the correct brushing and wax-picking technique. When done the right way, routine cleaning protects your investment and maintains sound clarity.
When traveling, pack a portable cleaning kit with your soft brush, wax pick, dry cloth, and a small bulb blower. Since moisture levels vary by climate, storing your hearing aids in a travel-size drying case overnight is especially important to prevent condensation. Clean your hearing aids at the same time each day to avoid forgetting—many users choose in the evening before bed.
Avoid washing earmolds while traveling unless you have time to ensure they completely air-dry. If you’re flying, keep your hearing aids in your carry-on, not checked luggage, to avoid heat or impact damage. Also, avoid leaving them in a hot car. If you're swimming or showering on your trip, always remove them first. With a small routine and the right supplies, hearing aids remain clean and dependable while you’re away from home.
You may need professional cleaning if your hearing aid still sounds muffled or inconsistent after brushing, wax removal, and drying. Other signs include persistent whistling feedback, moisture inside the casing, or reduced volume even with new batteries or at full charge. If the microphone filters appear clogged, cracked, or discolored, they may need to be replaced by your hearing care professional. Tubing that has hardened, yellowed, or frequently collects moisture may also require professional attention. Additionally, if you see wax deep inside areas you cannot safely reach, do not attempt to dig it out. Clinics have specialized suction tools and micro brushes to clean delicate components without causing damage.
Miracle-Ear offers professional hearing aid cleaning and check-ups at no cost. These appointments are recommended every 4–6 months and include professional cleaning of hard-to-reach areas, inspections for deep wax, and adjustments to ensure proper function. You can schedule these services at your local Miracle-Ear.


.jpg/jcr:content/renditions/cq5dam.web.700.700.jpeg)